Rebuilding / Recelling a Cordless Drill Battery

PLEASE NOTE!
- This information is provided only to show you how I did this.
- This is not intended to encourage any such behavior on your part.
- Any repair or modification to these things can be dangerous:
- Miswired cells can explode or catch fire;
- Cadmium is deadly to humans and pets;
- Solder may contain lead;
- Something could go so seriously wrong that causes a tragic domino effect destroying your city, state, country, and civilization as we know it, reducing the planet to a desolate charred landscape with only the occasional one-winged smoldering cockroach plying the ruins.
- Not to mention - you will certainly void your warranty.
- Don't even try this. Go away.
- Washing hands after touching NiCad's. Cadmium is nasty.
- Always treating the cells as if they were charged.
- Never allowing any wire, cell tabs, or metal to touch another.
- Triple taping areas where the sharp edges of the soldering tabs could cut through the tape
- Sub-C replacement cells: "high discharge" high capacity (2500mAh) 1.2V
with soldering tabs
(These were found with a simple web search. I used NiCads: the originals were, the charger was made for them, and the only "high discharge" cells I could find were NiCads.) - High-temperature 18ga. wire
(The original wire inside the case was 16 ga, but I found this too hard to deal with. The 18 has handled the high discharge amperage without overheating.) - High-temperature electrical tape
- High-temperature duck tape
- Soldering iron, solder
Cost of a new OEM battery: $45.
Total time: 2hrs.
That comes down to $13/hour for my time. [Update: +1/2 hour spent repairing a short where the sharp edge of a solder tab cut through the electrical tape. Smoke. Flame. Now at $10.40/hour.]
See - it's not worth it. Don't try this. Play with your kids instead - maybe they won't turn out as career criminals after all.
Opening the battery case
- I used a dremel tool with a spiral bit to carefully cut open the bottom of the battery case about 1/16'' above the bottom, being very careful to not cut through into a battery. Think cadmium.(fig 1,2)
- I pulled off the bottom of the case, and slid the battery pack out.(fig 3,4)
- I cut open the plastic wrap around the cells with ordinary scissors and unwrapped the cells. Note that the contacts for the whole battery pack are attached to the topmost cell, which lies inside the upper body of the pack.(fig 5,6)
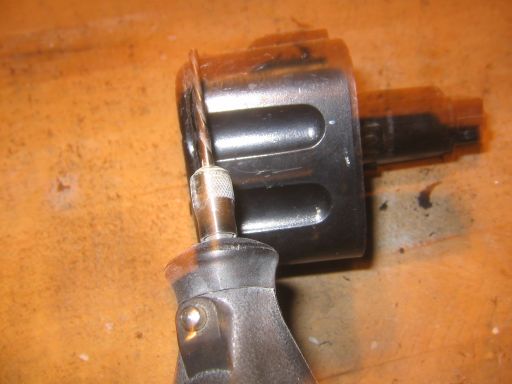 fig 1 |
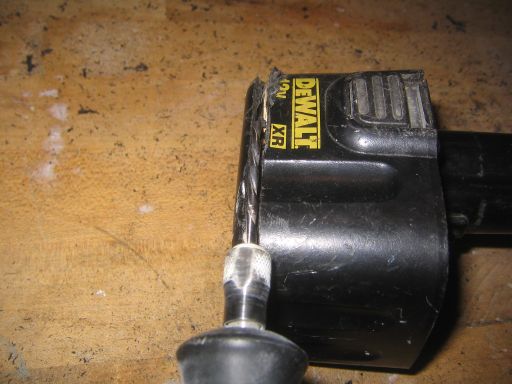 fig 2 |
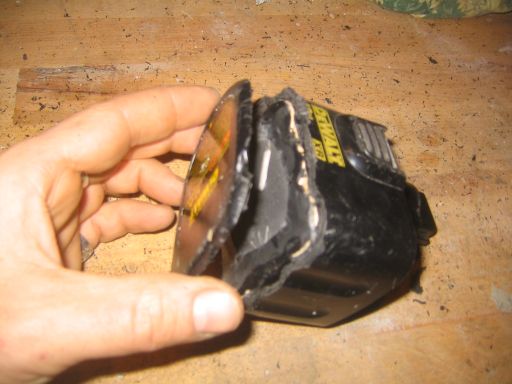 fig 3 |
||
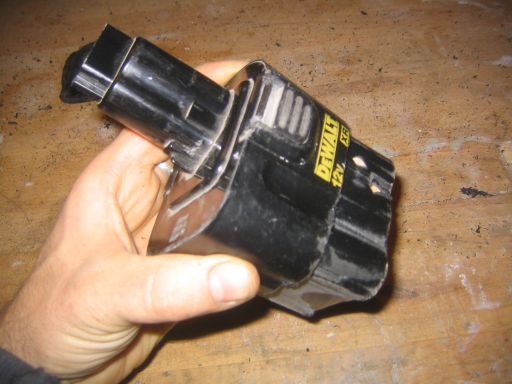 fig 4 |
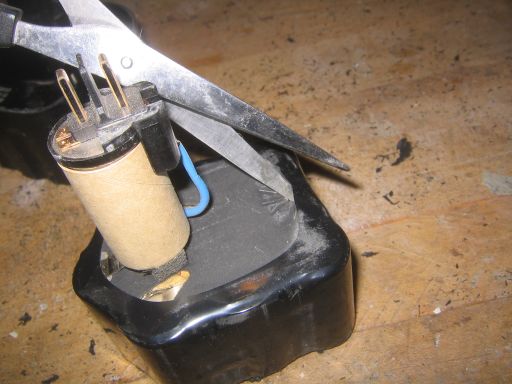 fig 5 |
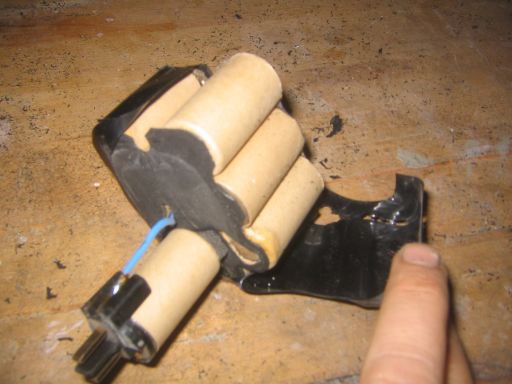 fig 6 |
Separating the cells and the parts
- Peeling off a thin layer of tape on the bottom of the cells revealed solder tabs connecting the batteries together.(fig 7)
- I cut the solder tab holding the topmost cell onto the lower pack of cells.(fig 8)
- I slid the cardboard sleeve off the cell, and removed the plastic ring underneath.(fig 9,10)
- I used a razor knife to carefully cut the solder tab holding the battery contacts to the top of this cell. The battery contacts will be reused for the new pack.(fig 11,12)
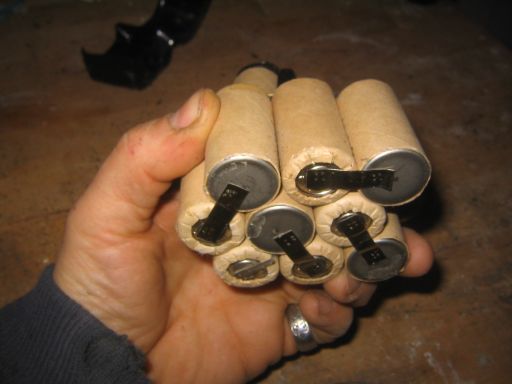 fig 7 |
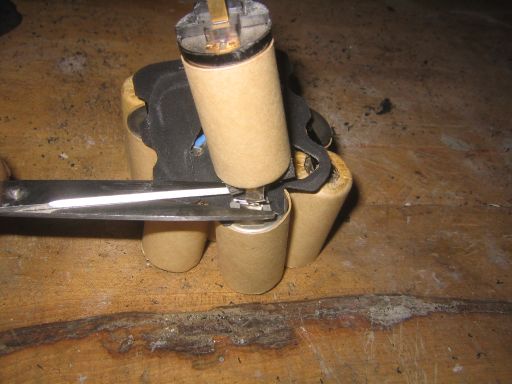 fig 8 |
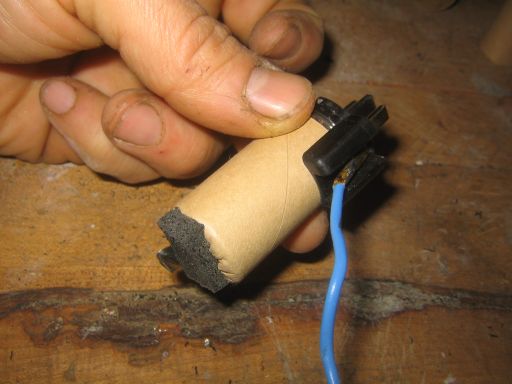 fig 9 |
||
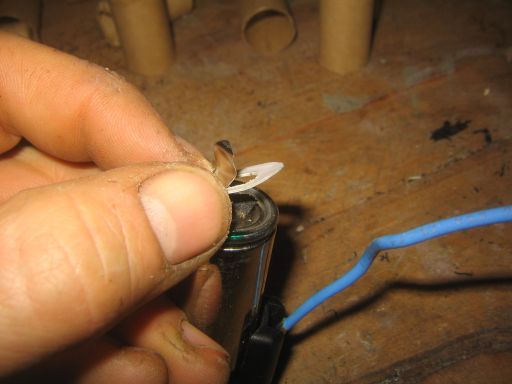 fig 10 |
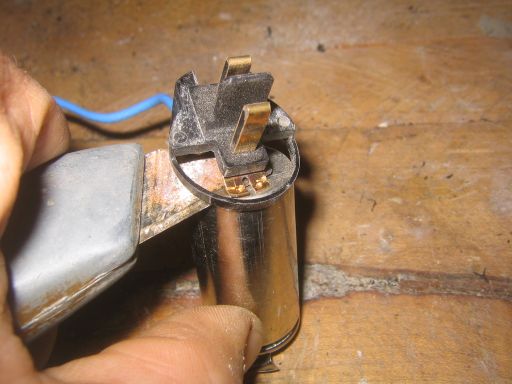 fig 11 |
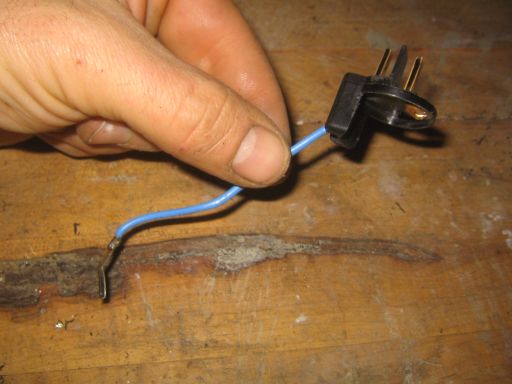 fig 12 |
Soldering the new cells
- REMEMBER: the cells have charge in them right from the box. As they are connected together, the resulting voltage will increase, as will the shock and fire hazard if accidentally shorted!
- Here's a comparison of the old and the new cells.(fig 13,14)
- I cut a bunch of 1.5'' pieces of wire, and stripped 1/4'' from each end.(fig 15)
- I punched a hole into each solder tab with an awl.(fig 16)
- I threaded a wire through the hole,(fig 17)
- And soldered it onto the tab.(fig 18)
- 9 of the cells were laid out in the same pattern as the old cells, noting both the overall pattern and which were (+) or (-) side up, in order to see which tabs to solder. The cells are all soldered in series, meaning that (+) poles are soldered to (-) ones. The 10th cell will be soldered to the top of this pack.(fig 19)
- Connected cells are soldered together, and any exposed solder tab ends are wrapped with high temperature electrical tape. (This could be done better by bending and soldering adjacent tabs together directly, and using heat-shrink tubing everywhere....)(fig 20,21)
- The wire and the solder tab on the plastic piece with the battery pack contacts are lengthened with wire.(fig 22)
- The correct pole of the 10th battery is soldered onto the inner wire of the contacts.(fig 23)
- The solder tab for the other pole of the 10th battery is soldered directly to the solder tab of the middle front battery of the pack of 9, so that it will sit low on top of the main pack.(fig 24)
- All of the soldered connections are protected with heat shrink tubing.(fig 25)
- Here is my completed battery pack with only the last wire of the contacts left to connect.(fig 26)
- I tested the voltage with a multimeter, to ensure all the cells were correctly connected.(fig 27)
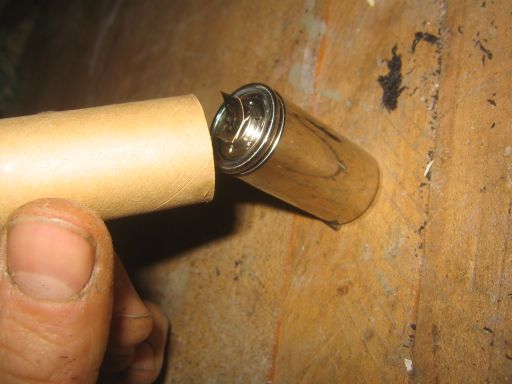 fig 13 |
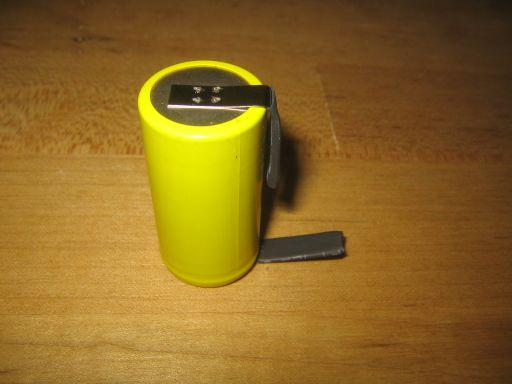 fig 14 |
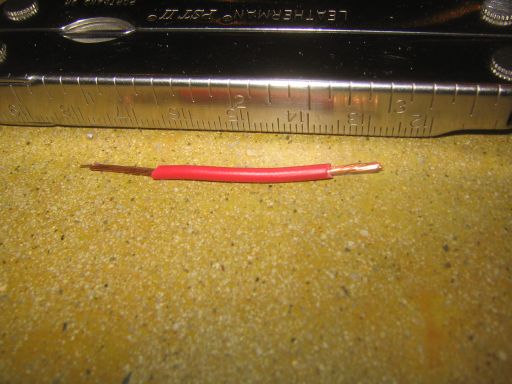 fig 15 |
||
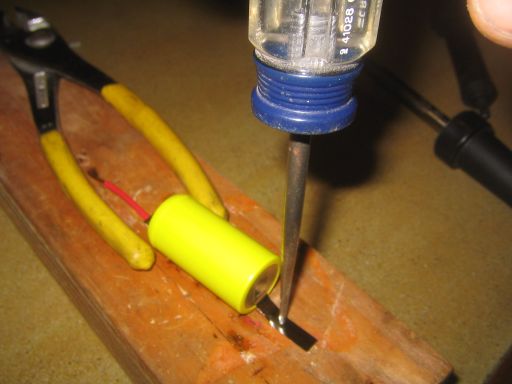 fig 16 |
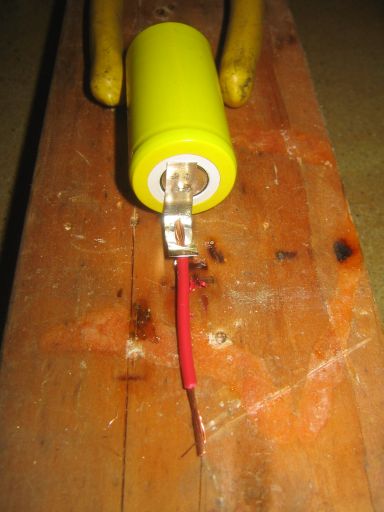 fig 17 |
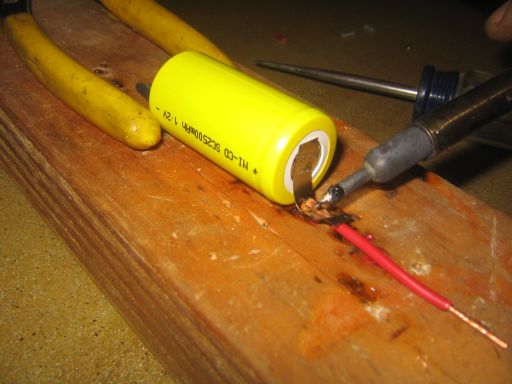 fig 18 |
||
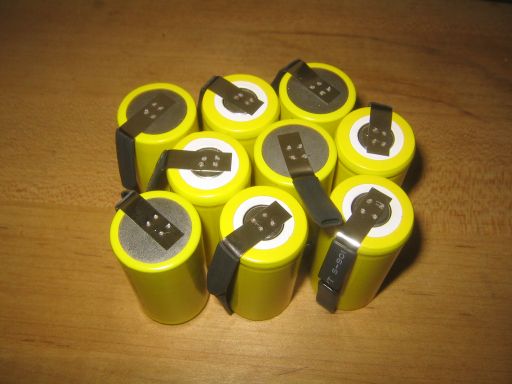 fig 19 |
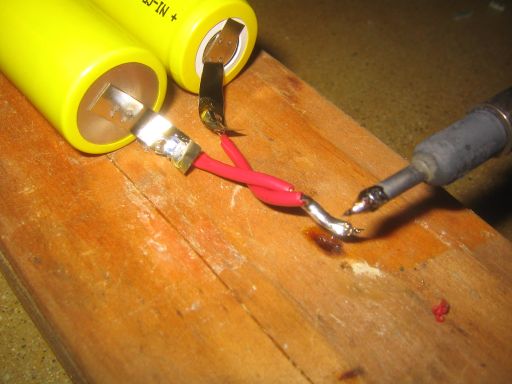 fig 20 |
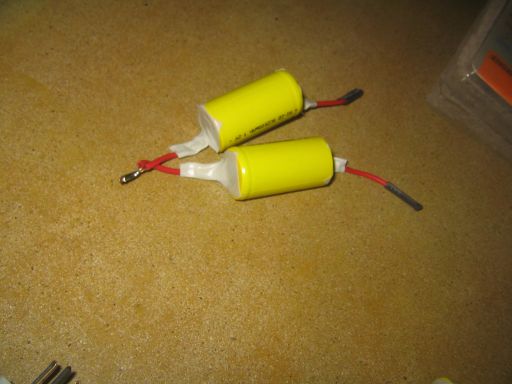 fig 21 |
||
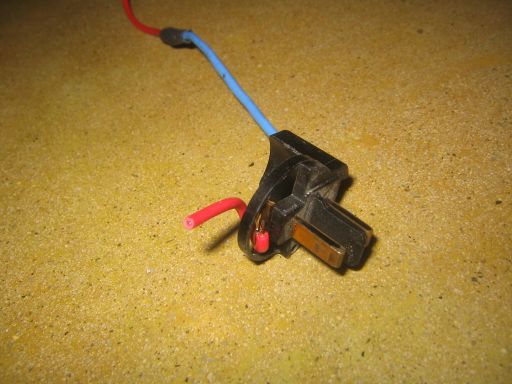 fig 22 |
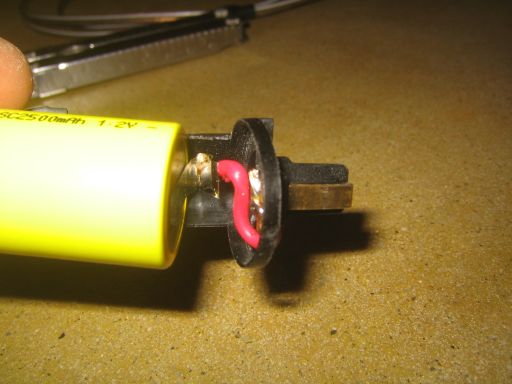 fig 23 |
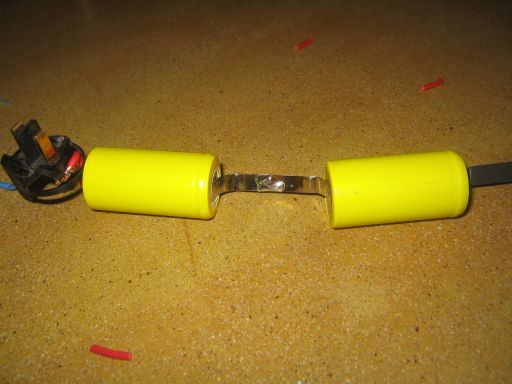 fig 24 |
||
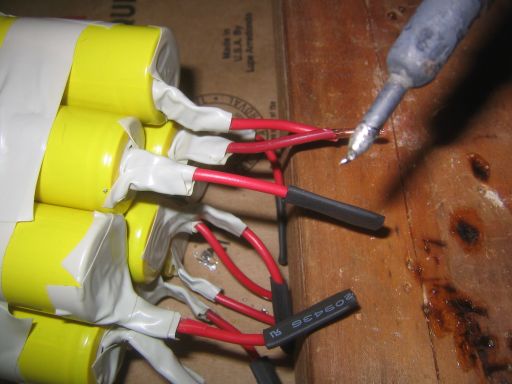 fig 25 |
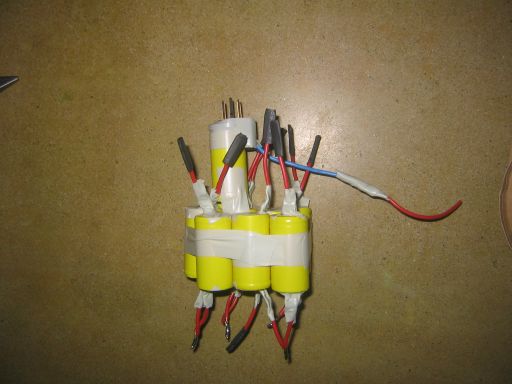 fig 26 |
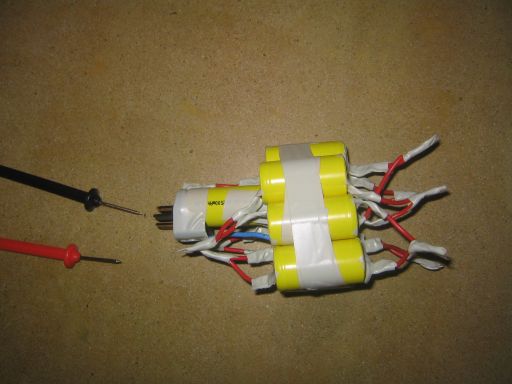 fig 27 |
Reassembling the battery pack
- The cell pack was carefully inspected for any exposed contacts or wire, and taped several layers thick between edges and under the topmost battery. The pack was slid into the old casing, ensuring the contacts ended up in the correct place.(fig 28,29)
- Good ole duck tape was used to hold the old bottom of the case on...great, but jenking it together like this makes the structural integrity of the whole pack suspect.(fig 30)
- The work was inspected by the local inspector.(fig 31)
- REMEMBER: something like this must be tested carefully, and SHOULD NOT BE LEFT UNATTENDED WHEN CHARGING FOR THE FIRST FEW TIMES!! I watched carefully as the pack was charged, placing the charger on a non combustible surface. No problems here.
- HOWEVER, I did have a short on the first test - I tested the pack at high load (causing high current discharge in the pack). A short caused smoke and melted plastic where the sharp edge of one of the solder tabs cut through insulation!! The short was easily fixed, but could have caused serious damage if it happened some time later.
- That said, my re-celled battery pack has lasted 5 years and counting!
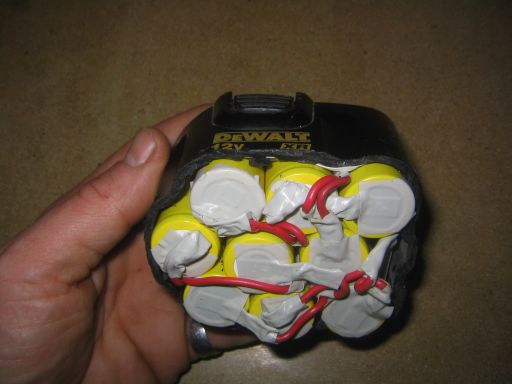 fig 28 |
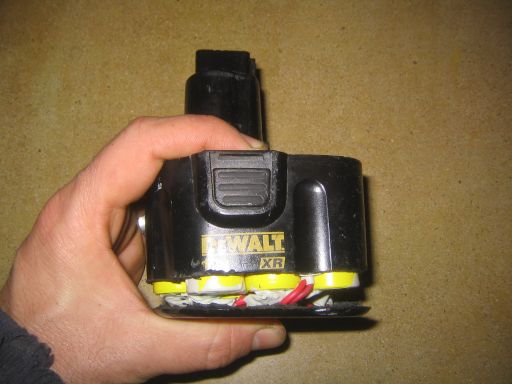 fig 29 |
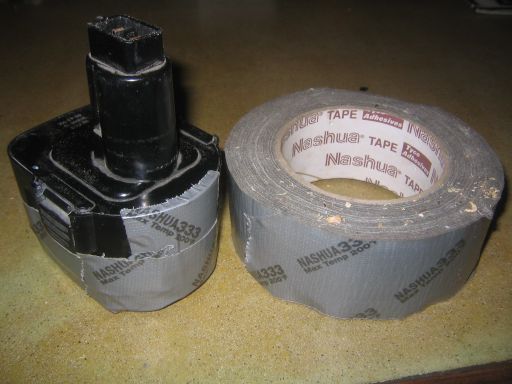 fig 30 |
||
 fig 31 |
